How to replace an old car headliner
We can't do an online guide for every classic car headliner installation, but we can provide you with the basic concept of how to replace the headliner in an old car. There is some basic steps to follow when replacing the headliner in an old car, and if these steps are followed, it will make the installation much easier. However, it is still a job - that is why there are some people out there who do it for a living. But for those of you out there who like to do it yourselves, it is something that can be accomplished with a little time and some working with your hands.
For our guide on installing old car headliners, we are going to use a 1956 Chevy Belair for our directions. The 55 to 57 Chevy Belair cars are very popular cars and most of them have the sewn panel headliners in them.
As we said in the beginning of this guide, we don't have directions for every old car headliner, but this is some of the basic steps that we use in installing all old car headliners. The basic steps will help you to install your headliner in whatever type of car you may have. There are always things that will have to be "figured" out when working with 40 to 80 year old vehicles, sometimes there will things missing or moved from it's original place. You may find yourself "adapting" as you go along, but with a little work and perserverance, you should be able to install your own headliner in your old car.
| As you can see from this image of the headliner, someone had put a black vinyl headliner in the car. It looked ok, but the owner decided to go with a different color interior. So he wanted to get rid of the black headliner and replace it with a white one; because after all, white matches everything. | 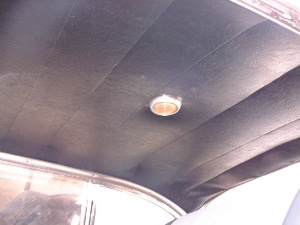 |
| This picture shows where the headiner is attached along the sides of the car. The Belair headliner has metal trim around the perimeter of the car, and the headliner itself is stapled to a tack strip underneath the trim. Some cars have a metal strip with teeth on it to hold the headliner in place along the edge of the car. Those cars have windlace tucked in between the headliner and the body of the car. Windlace is a rubber cored welting that trims off the edge of the headliner, and helps to seal the wind noise from the doors. Older cars used the windlace, but a few of the 50's and 60's used it as well. There are 3 types of windlace, the rubber cored type, the "pinch welt" type and the staple on type. You will have to decide on which one you have when you are disassembling your car. Remove the headliner from the car by removing staples, dome lights, cloths hooks, visors and trim. Take note to know where the metal rods go in the car, because it is easy to get them mixed up. Numbering them works great. | 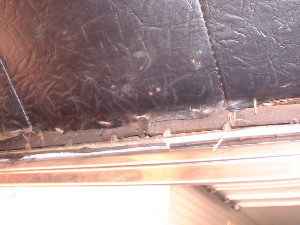 |
| Once you remove the old headliner, slide the metal rods into the new headliner (in the correct places they go according to your numbering - or whatever system you used to know where they fit into the car). The sleeves (cloth loop) that holds the rods may be a little to long, that is not a problem. Use scissors to trim the sleeve to just below where the rod makes the bend. Once you get the rods back in the new headliner, you are ready to hang it in the car. The new headliner may have some wrinkling due to packaging and shipping, but not to worry, when you pull it tight while installing it in the car; the wrinkles will start to dissapear. |  |
| This is not a great picture, but once you get the rods back into the headliner, hang it in the car. Start at the front and work to the back, hanging the rods in place as you go. Or you can start from the back and work to the front - either way will work just fine. When you finish hanging the headliner in the car, it is time to pull it tight (front to back). Attach it at the rear or the front about about 2/3's of the way along the window opening. Either by gluing it or stapling it (which ever applies to your car). When you get one attached, go to the other one (front or back) and pull the headliner tight, then attach it about 2/3's the way along the other opening. This will give you a good start at working the headliner and getting it good and tight in the car. If you have a car that the headliner has a wide panel in the back, you should make a hole for the back window opening. Remember, the material has to be long enough to attach around the window opening, so don't cut the hole to big. If you have a car like this, attach the headliner along the top of the rear window opening when you are going to pull it tight front to back. | 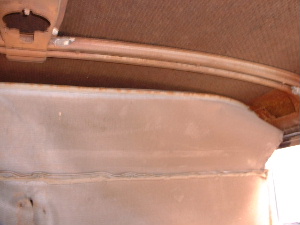 |
| Now at this point, the headliner should be somewhat tight front to back. Now it is time to start working the headliner in the car, pulling the slack out as you attach it around the car. The way we like to work the headliner is by starting in the middle of the car, pulling the slack out and stapling it as we go (or tucking it in the metal channel with the teeth - which ever applies to your car). If you start in the middle of the car, working the sides toward the rear or the front, you will begin to work any slack that may be int the headliner toward the 4 corners of the car. Once you get the sides attached to meet your approval, finish attaching the front and back of the headliner. And with any luck at all, your headliner should be tight and smooth in the car. | 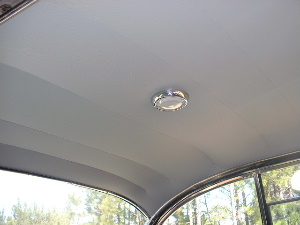 |
As we said in the beginning of this guide, we don't have directions for every old car headliner, but this is some of the basic steps that we use in installing all old car headliners. The basic steps will help you to install your headliner in whatever type of car you may have. There are always things that will have to be "figured" out when working with 40 to 80 year old vehicles, sometimes there will be parts & things missing or moved from it's original place. You may find yourself "adapting" as you go along, but with a little work and perserverance, you should be able to install your own headliner in your old car.